
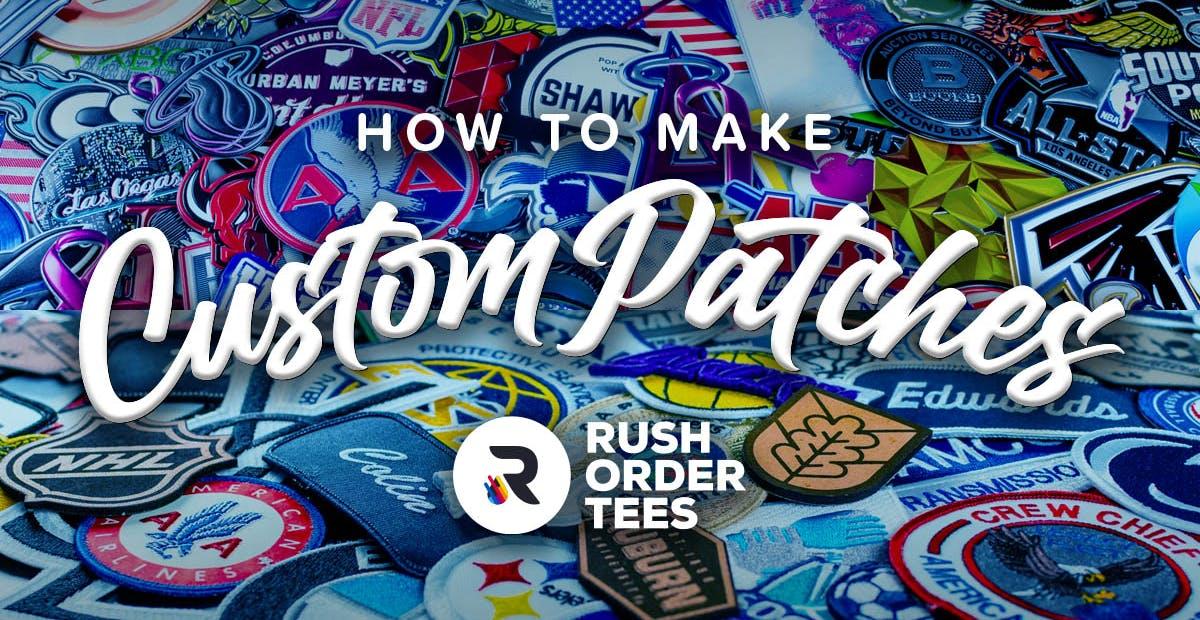

Custom patches are one of the best ways to cost-effectively brand a uniform, personalize apparel, and decorating accessories. An attractive logo patch adds a level of professionalism that reflects well on your company, organization, or special event.
Until recently, patches have been more costly than other customization options. The good news is that advancements in production techniques have brought that cost down and the minimum quantities.
The best part of all, today’s patches come in a variety of new styles, some of which are truly eye-popping. This article briefly introduces each style so you can decide which is best for your brand, along with design tips, placement standards, and more to help you learn how to make patches.
Contents:
- The different styles of custom patches
- Two types of patch application: heat seal or adhesive
- Making custom patches step-by-step
- General design tips for custom patches
- Print locations for patches on apparel
Styles of custom patches
A variety of styles means there are many distinct possibilities and options–it also means different design considerations for each. Let’s look at the characteristics of each type of custom patch and design tips.
Embroidered patches
Embroidered patches have the classic look of direct embroidery but without commitment. They’re created with high-quality, colorfast polyester threads and fabrics made to withstand industrial washes. Embroidered patches are an excellent choice for garments, bags, and hats in standard sizes and custom die-cut shapes.

Pro tip: for embroidered patches
Keep the design simple. Small text and details can sometimes get lost in the stitching, while gradients and photorealistic images can be difficult to reproduce. Simplified logos and designs tend to work best.

3D Embroidered patches
3D embroidered patches include a layer of EVA foam in certain areas under the stitching, giving it a raised, three-dimensional look. Select areas of emphasis to make them the most prominent on the patch, which creates an eye-catching look. This style has become wildly popular, especially on athletic apparel and team hats.

Pro tip: 3D embroidered patches
Selecting the most prominent element in your logo to be the raised embroidered part emphasizes contrast and will make the patch design truly stand out.
Sublimated patches
Offering a full-color palate and a high level of detail, sublimation is a form of digital printing that starts with white material and permanently dyes it. Sublimated patches are great for the accurate reproduction of photorealistic images and logos, as well as gradients and subtle blends. They are used in a variety of applications, such as staff uniforms.

Pro tip: Sublimated patches
Keep the design simple to ensure that any logo or text used can be seen from a distance. Also keep in mind that there is a subtle texture to the fabric that is printed on.
Print Stitch patches
Print Stitch patches combine embroidery and sublimation. The background is printed with a full-color, photographic image and then embroidery stitched into it, giving dimension and texture. This type of patch offers photorealism with texture and can be used in a wide range of applications.

Pro tip: Print Stitch patches
Select a simple central element or text for embroidery, while reserving the more complicated elements for sublimation to achieve the best results.
Rubber Patches
Also known as PV+ patches, rubber patches are the latest trend and newest technology for customized emblems. The uniquely flexible, smooth surface and three-dimensional look have everyone asking about them. A patch like this can elevate any item with its clean, modern, branded look.

Pro tip: Rubber patches
Rubber patches are ideal for heavier fabric and structured garments, such as jackets, hats, and bags, but less ideal for lighter fabrics and garments because of the weight.
Leather patches: Genuine and Faux
Leather patches are the way to go if you want a simple, classic, rugged, or rustic look. Available in both genuine and faux (fake) materials, these patches are laser engraved to create a distinctive, monochromatic look. And they match almost any style. Keep in mind that Faux Leather patches can be washed, but not Genuine Leather.

Pro tip: Leather and Faux Leather patches
Due to the materials, a full color palate can’t be used, so the design file needs to be in black and white (although the final product will be brown, tan, etc). Optimize the look by using a classic patch shape, and adding borders or fake stitch lines.
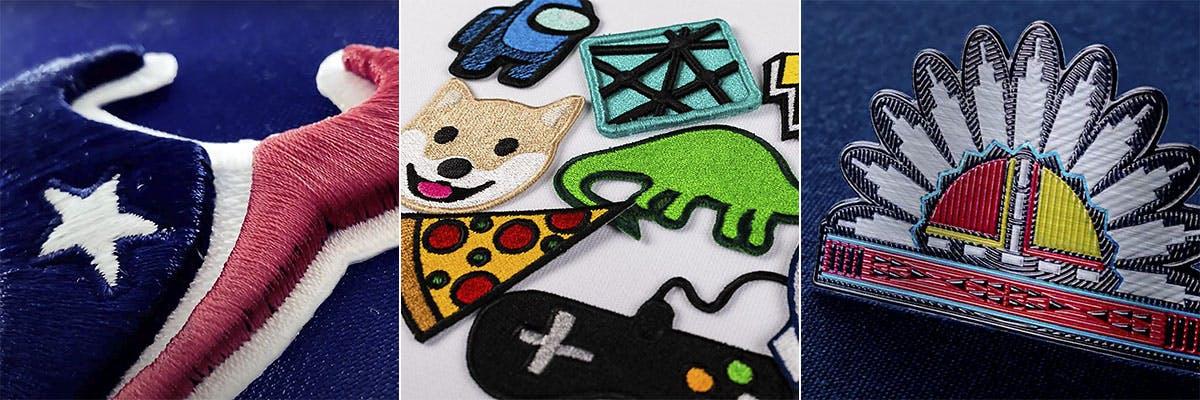
FlexStyle Patches
The newest style people are going crazy for, FlexStyle patches are undeniably attention-grabbing. Soft and flexible with textures, FlexStyle patches bring dimensionality and dramatic finishes, making for an impressive-looking emblem. These are not only applied to garments, but also flat surfaces of all types. They’re like stickers on steroids.

There are four styles to choose from:
- Domed – A puffy patch with a shiny, smooth 3D surface. These things pop.
- Beveled – Similar to domed, but with sharper edges for a cool, angular look.
- Flat – A classic look with an elegant flat surface and slightly beveled edges.
- Textured – A thin patch with deep, subtle texturing and tiny detailed ridges.

Pro tip: FlexStyle patches
Consider the design to select the best style. The Beveled style works best for angular desings, while Domed is a better choice for designs with soft edges. The Textured style is thin and a good choice for lightweight garments such as soccer jerseys.
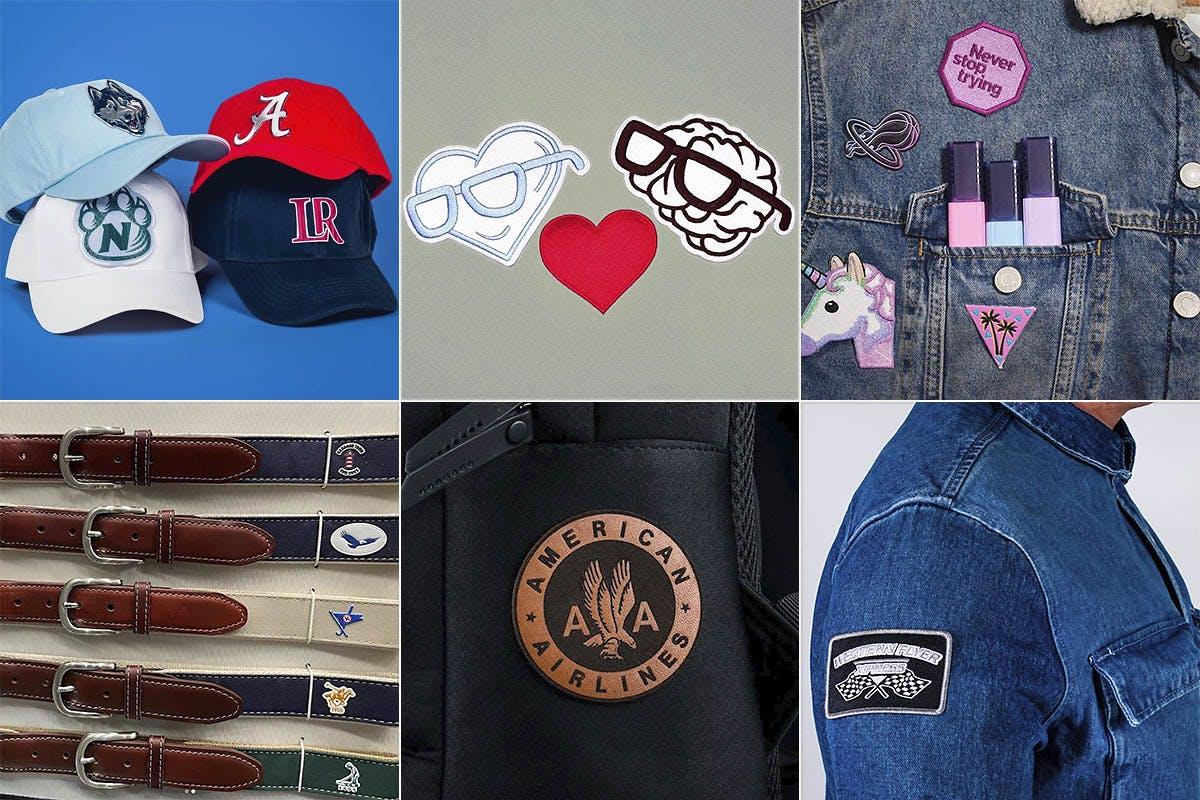
Two ways to affix patches: Heat Seal and Adhesive
There are two ways to affix custom patches, and they make for two different uses: “Heat Seal” is for garments and other soft goods like bags, and “Sticky” is for self-sticking to hard goods like glasses, mugs, laptops, and phones cases, etc.
1. Heat Seal Patches – pressed onto garments and other soft goods
The primary method is heat-pressing the patches onto garments and other items of your choice in the location of your choice. Heat seal is the choice for staff uniforms, team shirts, company swag, merchandise, promotional products, and premium fashion branding.
A great patch will elevate any product and bump up the value of retail items.

Can these patches be ironed-on to garments at home?
We don’t recommend it. Heat seal patches require a specialized press that applies a specific temperature (to both sides), at a specific pressure, for a specific time. Ironing it on at home risks the patch not being affixed properly, and/or damage to the garment.

2. Sticky Patches – for adhering to hard goods and flat surfaces
Sticky patches have a strong adhesive backing that will adhere to almost any flat, non-porous surface. The ideal way to use these is as promotional giveaways or merch, and then people can stick them to whatever they want: glasses, mugs, laptops, phone cases, guitar cases, tool boxes, record boxes, cars, refrigerators, doors, luggage, and more.
For that reason, make sure your design is something that people would want to see on their personal items.
Are Sticky Patches permanent?
Sticky Patches use an industrial-strength glue, so they’re made to stay affixed. Within 48 hours the bond fully sets, after which its durable enough to withstand a dishwasher. For best results, make sure the surface is clean, non-porous, and free of waterproofing.
Making custom patches step-by-step:
- Decide how you will use the patches.
- Select the style of patch you’re interested in.
- Prepare your logo, image, or graphic.
- Upload your logo and set the quantity, size, etc.
- Choose your items to be embellished, if any.
- Place the order, and a sales rep will be in touch.
Design tips for custom patches
Applying some basic design principles can make a good custom patch great.
- Simplify the artwork. Highly detailed graphics don’t translate well onto a small patch, especially if you’re getting embroidered patches. Simple, clean, bold designs work best and stand out. Bonus points if your artwork is vectorized.
- Remove small type. Consider omitting the smallest type, especially if it’s not crucial to your message or logo. Or increase the size of your type, or choose new fonts if possible. Otherwise, it may not print well or people might not be able to read it.
- Reduce the number of colors. Some patch styles have limited colors, so get a jump on it and remove colors not necessary to your brand. Even if your patch style allows full color, it can be too busy or clash with the garment color.
- Consider background and border. This tip applies to patches with backgrounds and borders (Embroidered, Sublimated, and Print Stitch). The background color, border color, and border style all contribute to the overall look.
- Choose the right size. Think small. Most patches look better (and feel better) at a small size. A typical size is around 2.5″ but some patches can go down to .5″ x 1″ which can look refined and professional. It’s wise to avoid oversized patches.
- Choose the right shape. Consider if your design would benefit from a custom die-cut shape, or if a standard shape would suit your needs. A custom shape is great if you want a unique look– and it increases the wow factor.
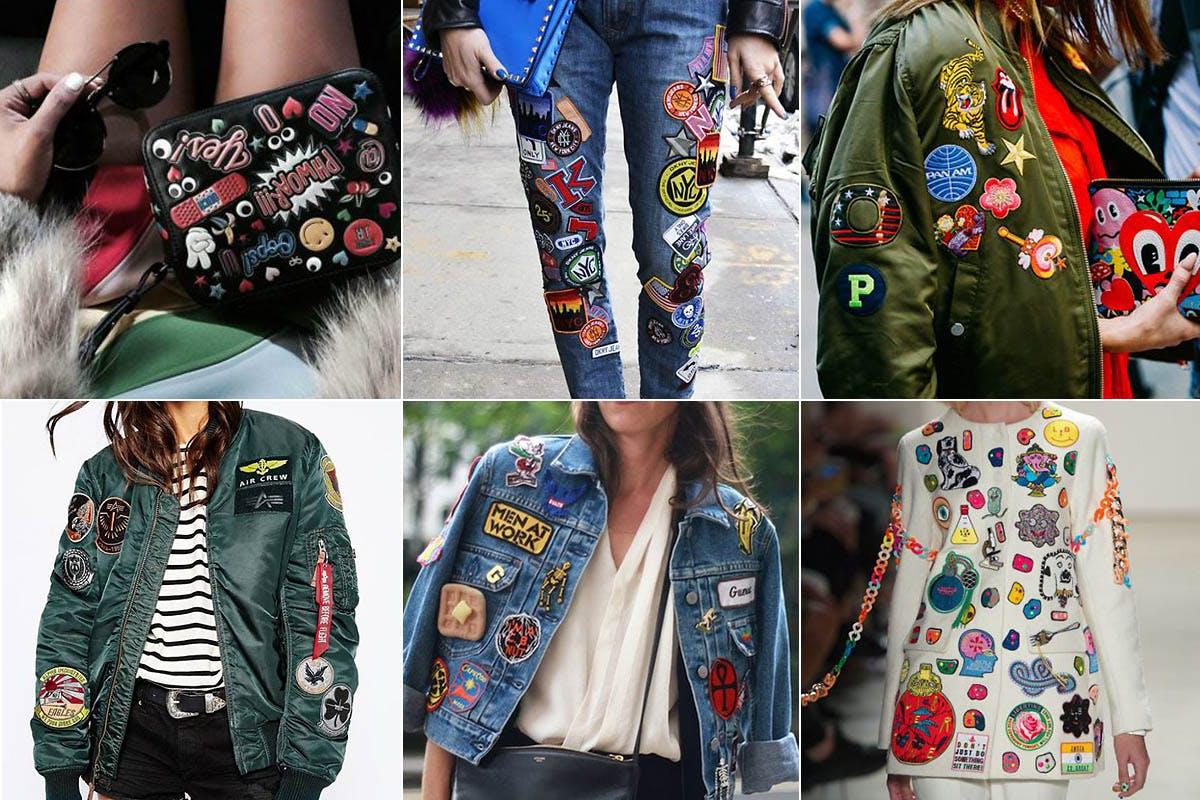
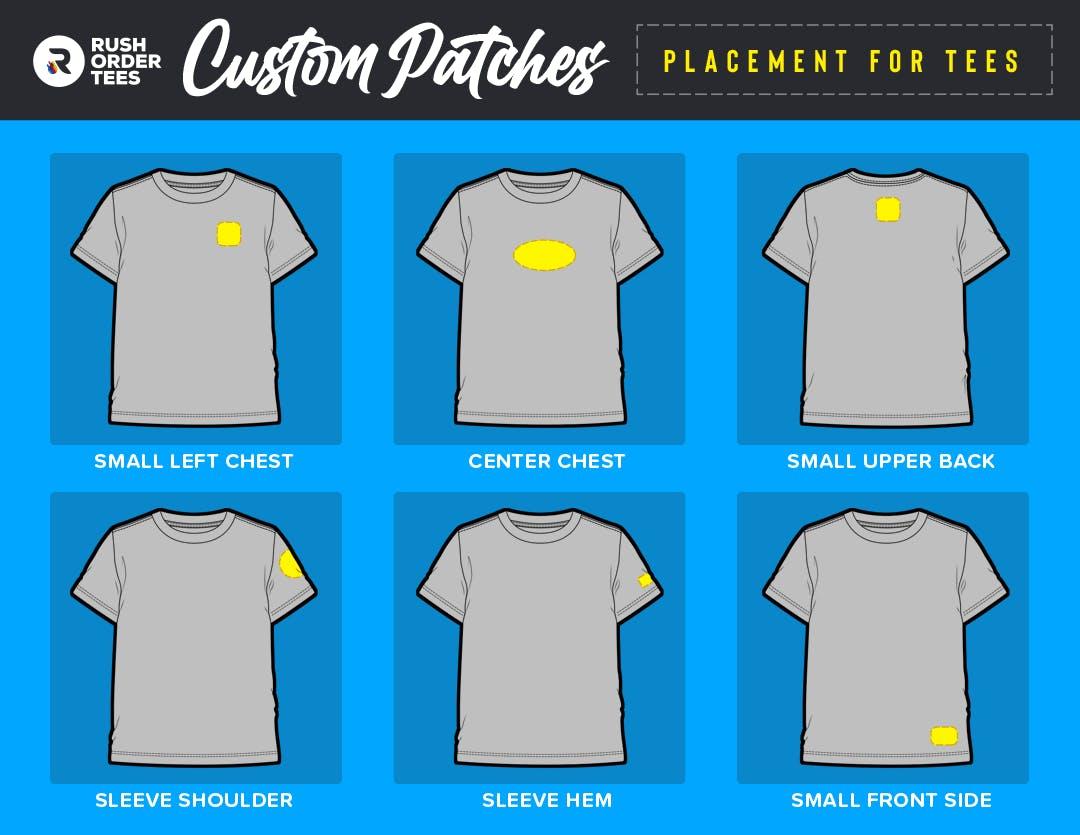
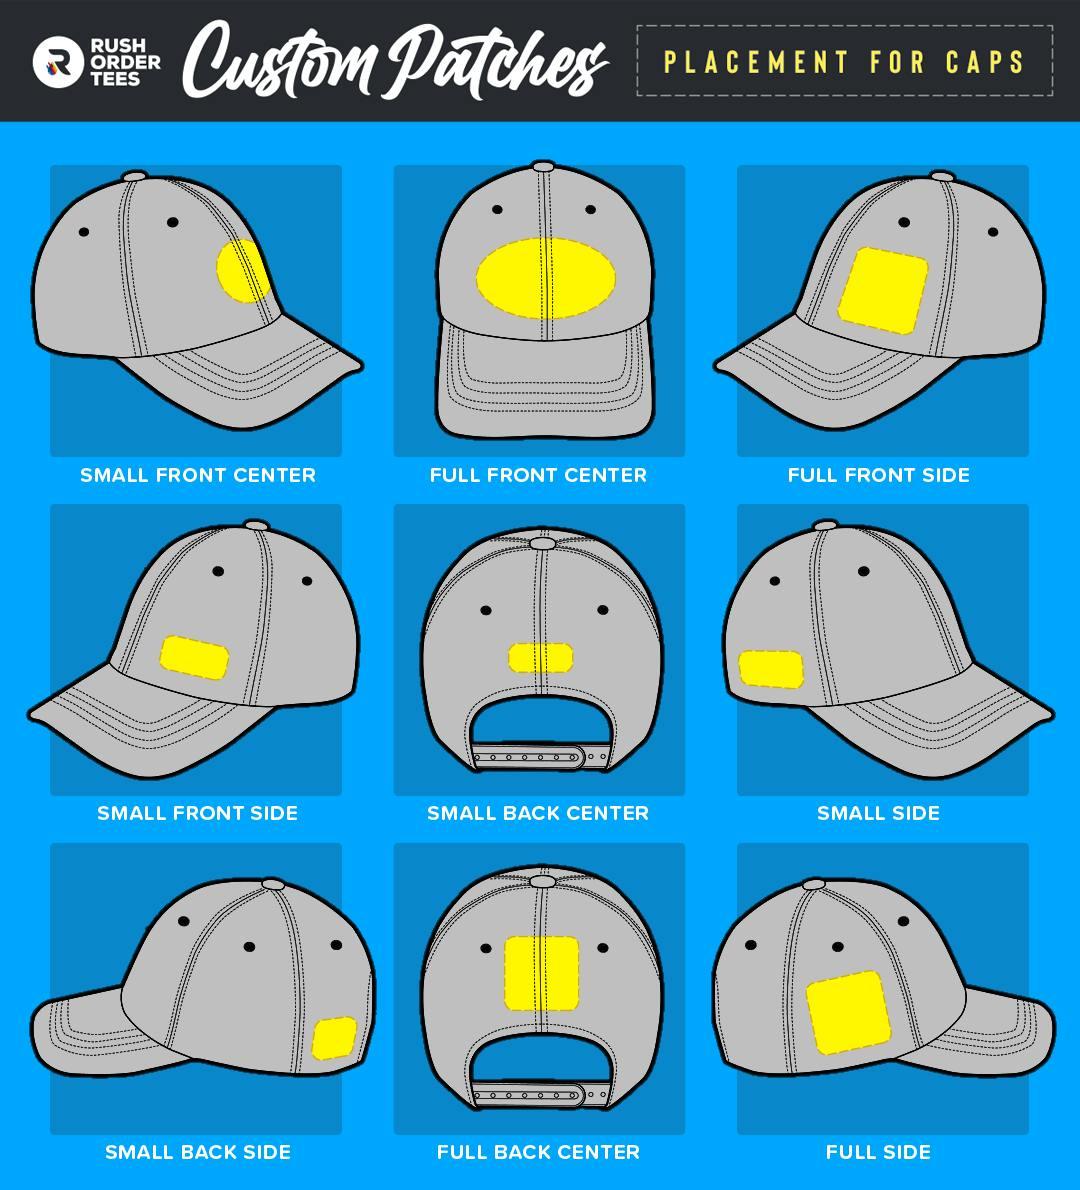
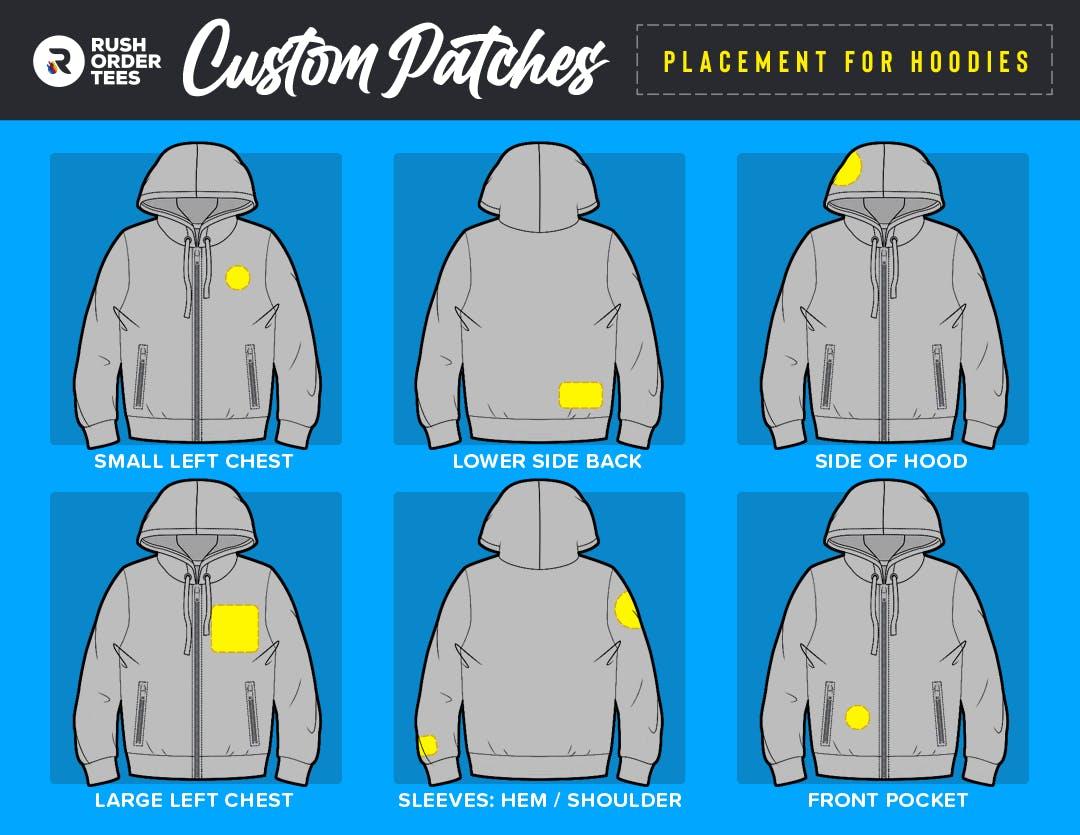
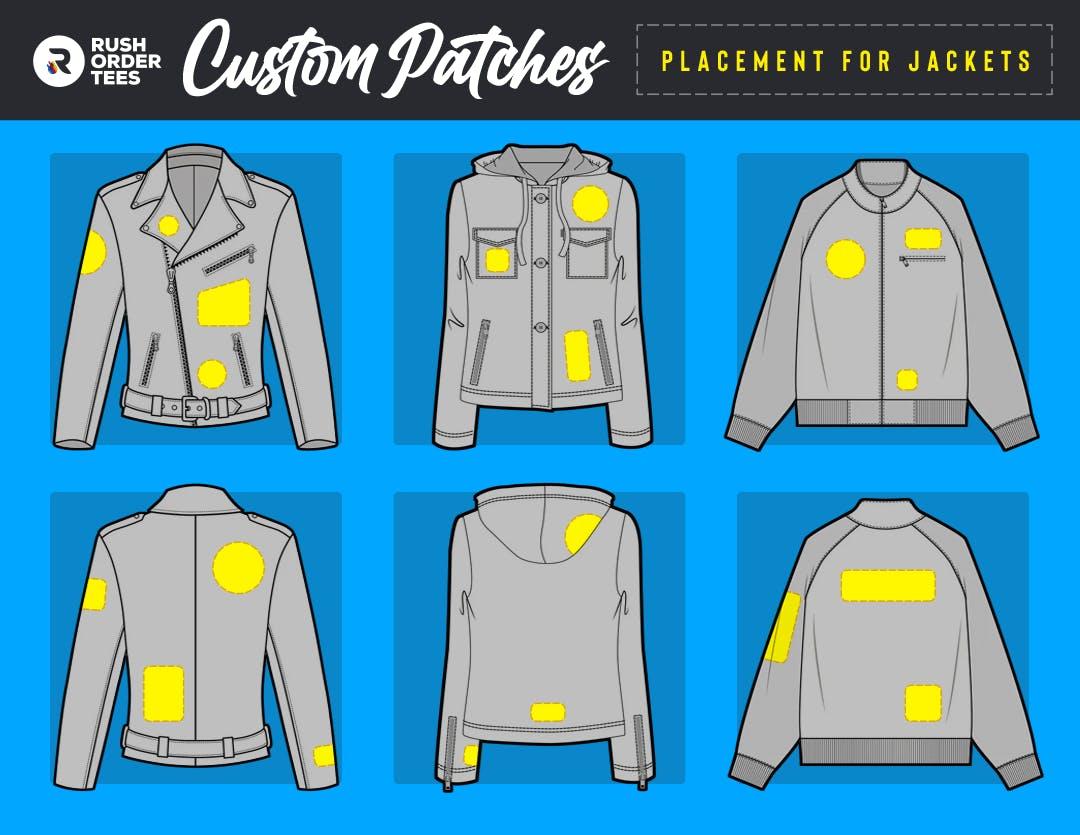
Patch placement recommendations for apparel
Where you put the patch is almost as important as the design itself. Sometimes the standard placement is the way to go (uniforms, for example). Or you may want to consider alternative locations to stand apart from the crowd (merch, for example).
T-shirts and sweatshirts
Hats and caps
Hoodies
Jackets
Making a custom patch is easy
Patches are more popular and affordable than ever, and there have never been more options to customize apparel. Plus, learning how to make patches has never been easier. We’re confident that you’ll get fantastic results by applying this information when making your next custom patch. Feel free to get in touch with any questions, our art department and project specialists are always here to help.
