
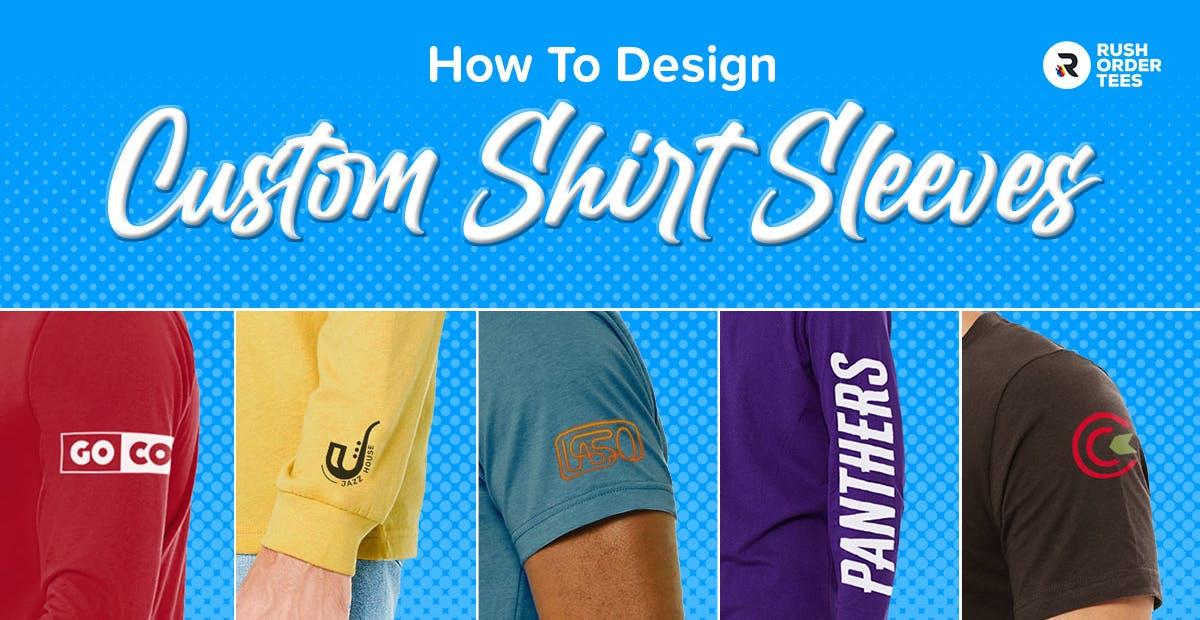
The sleeve is an outstanding print location that is often overlooked. Ideal for a range of brand messages, it can accommodate everything from a simple logo on a short sleeve tee to an intricate design on a long sleeve shirt. In this post, we cover the basics of t-shirt sleeve design.
Why print on the sleeve?
A custom t-shirt with a printed sleeve can make an otherwise ordinary t-shirt design exceptional. We print thousands of t-shirts a day, and fewer than some out of five orders have a sleeve logo. A well-designed sleeve elevates the brand, making it stand out.
Sleeve logo sizes & locations
Printing on a sleeve offers a surprising number of options. Get to know the standards, and then get creative. Here are the top six shirt sleeve print locations for your custom print, with size and placement details, design considerations, and examples.
Standard sleeve

The standard sleeve print is between 2-4" wide, with placement at 1" from the hem, or 2" from the edge of the sleeve, centered on the shoulder seam. This size and location are versatile and work for just about any simplified logo design.
Small at the hem
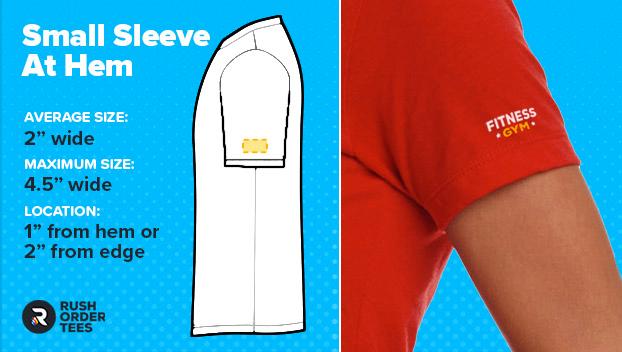
Smaller sleeve prints are also standard, measuring between 1-3" wide, placed 1" from the hem, and centered on the shoulder seam. This option is ideal for simple typographic logos or icons.
Shoulder sleeve

The shoulder is a bold alternative sleeve location. Sized slightly larger than standard at 3" -5" wide, with placement sound 2" down from the shoulder seam. This is not only preferred by the military and first responders, but it's a popular choice for a sporty look.
Standard long-sleeve

Long-sleeve prints typically run vertically, with a maximum size of around 15" wide (top to bottom) and a maximum height of 5" (side to side). These designs are often words: company name or team name, etc.
Armband long-sleeve
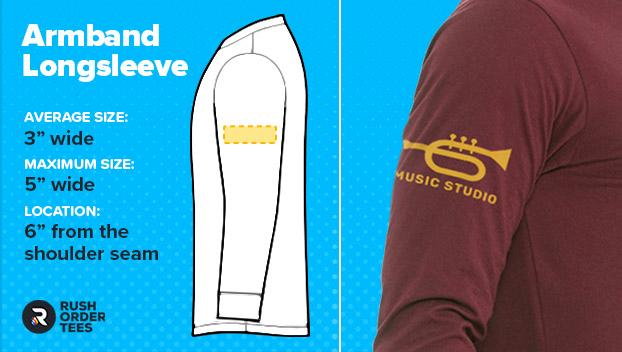
An armband is an alternative customization location not seen frequently. Running horizontally across the bicep, the armband shirt sleeve designs are sized 1-3" high with a maximum width of 5" and positioned 6" below the shoulder seam.
Wrist long-sleeve print
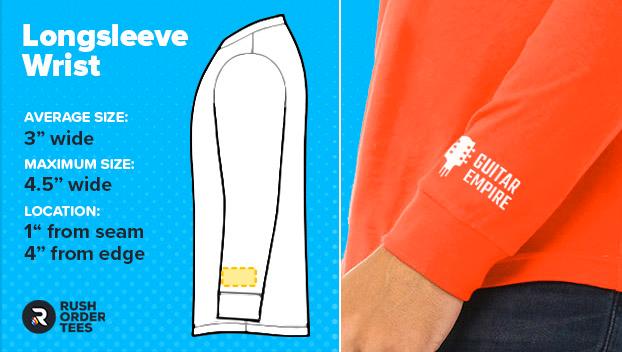
A long-sleeve wrist print is similar to the hem print on a short-sleeve tee. Sized between 1-3” with a placement of 1" from the wrist seam or 4” from the edge of the sleeve. An excellent eye-catching location for a logo, it's particularly effective for those whose hands are visible, like hospitality workers.
Sleeve customization methods
Just about any method can be used for the sleeve. Understanding the available customization styles can make creating a good shirt sleeve design easier. Each method has its own strengths and weaknesses, so consider these methods when designing your t-shirt sleeve.
Screen printing
Traditional screen printing remains the people's choice. The classic method is the go-to for a straightforward sleeve print and the most budget-friendly, especially for larger orders. The only downside is limited color and detail accuracy. More about color and details in the design tips section.
Heat transfer
Heat transfers have reemerged as an excellent option for shirt sleeve designs. They can be full color and are great for preserving accurate details like thin lines, patterns, and more. In some cases, you can order the printed transfers and press them yourself.
Embroidery
Embroidery produces a design with a texture and shine that's incredibly durable. This method is the default choice for businesses that want to elevate their brand or establish legitimacy with a prestigious-looking sleeve logo on a work shirt. The only downside besides cost is its limitations with the accuracy of small details.
Sleeve design tips
We've printed hundreds of thousands of sleeve designs over two decades in the industry, and we know what works. Follow these expert tips to ensure your custom sleeve design will be clear, eye-catching, and successful in achieving your branding goals.
Keep it small & simple
When it comes to sleeve prints, think small. Most logos and designs must be “simplified” to work on the sleeve. Removing ultra-fine lines and unnecessary details that will be lost when scaling down will produce a clear, branded result. Here are a few examples:

Design for the print method
When designing the sleeve, the customization method needs to be considered to get the best results. Every technique has strengths. For screen printing, embroidery, or patches, simplify the art and reduce colors. You can use full color and gradients for heat transfers and digital printing and keep fine lines and small details.
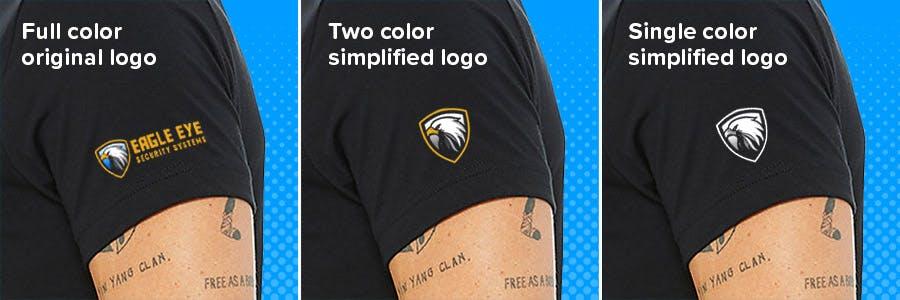
Use single color
As dazzlingly colorful as your logo might be, the truth is that sleeve designs work best with fewer colors. In most cases, a single color can do the job and even look better. This is especially the case for screen printing since it will reduce costs. For sleeve prints, we always recommend reducing your colors. Here are two examples:
Match the main design style
Most likely, you will have other print locations on your shirt, so the sleeve print must match or complement the rest of the shirt. If there's a predominant color in the front or back design, consider using that same color for your sleeve logo for a unified look, even if it's not your normal logo color.
Print American flags correctly
This one is a particular tip that we often get questions about. Yes, there is a standard for the direction of an American flag printed on a sleeve: The stars should be facing forward. So if it's a left sleeve print, the stars will be on the left and on a right sleeve, the right. Like this:

Coordinate the sleeve with other locations
Plan your design approach holistically, with the other print locations and sizes in mind. Consider how the different elements will look all together. One example is if you have a left chest print and add a sleeve print, choose the right sleeve, so the designs are not directly next to each other.
Design a shirt sleeve that gets noticed
Custom shirt sleeves add visual interest, increase visibility and make every shirt special. To get the best result, simplify the design, use single colors, and design for the customization method. Follow these tips to produce an eye-catching, successful custom sleeve design that will make your shirt stand out.
Instructions for setting up your sleeve in our Design Studio: Upload your artwork and position it somewhere near the sleeve, off to the side of your main design. Then add an instructional note about placement, and we'll take care of the rest.

About the Author
A graduate of the Multimedia program at the University of the Arts in Philadelphia, Imri Merritt is an industry veteran with over 20 years of graphic design and color separations experience in the screen printing industry.