
Embroidery is the most professional way to imprint your logo on garments and other items. Of all the customization methods, it’s the most durable–and refined. Custom logo embroidery provides legitimacy to company shirts, added value to branded merch, and prestige to uniforms.
To get the best results from embroidery, design with the limitations of this decoration method in mind, whether you’re adjusting your current logo or creating a new look. We put together this brief guide to help you learn the best way to design a logo for embroidery.
Logo embroidery basics
Understanding the basics of the embroidery process will give you a better chance at success. Here’s an overview of the steps involved in customizing apparel with embroidery.
What is Embroidery?
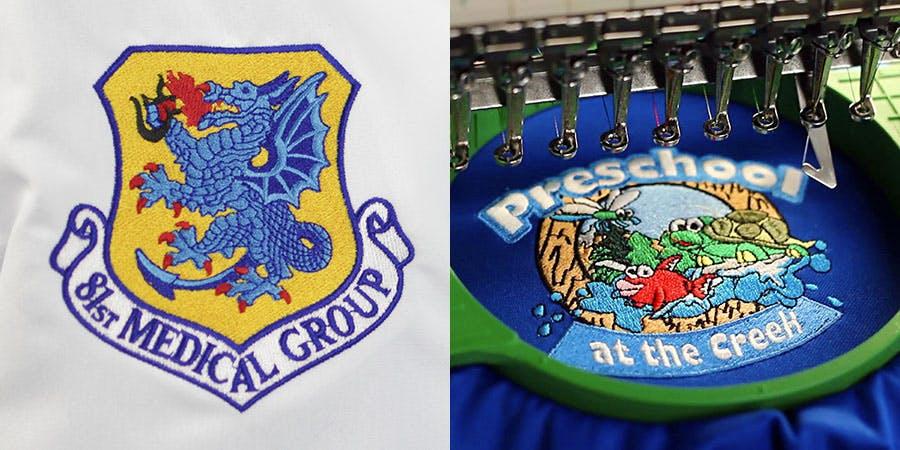
Embroidery is the decorating of fabric using thread that is sewn directly into the fabric of a garment or other item. The result is a unique, eye-catching customization that is part of the item itself. Some of the most popular items for embroidery are polo shirts, dress shirts, jackets, caps and beanies, aprons, and workwear.

Embroidery has been used to decorate clothing for thousands of years. Modern production techniques like ours involve optimizing digital artwork, creating custom stitch patterns, and loading the files into automated, rapid-fire machines to produce amazing results at a high volume and fast turnaround time.
Steps in the custom embroidery process
It starts with a quality design from you and follows through a series of steps requiring knowledge and experience to make the right design choices. For the vast majority of jobs, the process goes like this:
- Logo design – Everything starts with your design. The rest of this article gives you all the information you need to be set up for success.
- Garment selection – Choose the garments and other items you would like to embroider. These selections will help determine your design size and colors.
- File upload – The best file formats for embroidery are vector files (EPS, AI, or PDF). Otherwise, use a high-resolution bitmap file (PSD, PNG, JPG).
- Logo design proof – Check carefully to make sure the colors, sizing, and information is correct. Once you approve your proof, the production process begins.
- Digitization – Your artwork is “digitized”, creating a DST file containing the custom stitch patterns which the machines read and work from.
- Embroidery production – Each item is hand-loaded and monitored as the machines sew the stitches. Afterward, any stray threads are meticulously removed.
Logo design for embroidery
There are various factors that go into how a finished product will look, from your logo design to the product to the production process. Carefully considering each of these factors will ensure that your embroidered logo communicates your message–and looks outstanding.
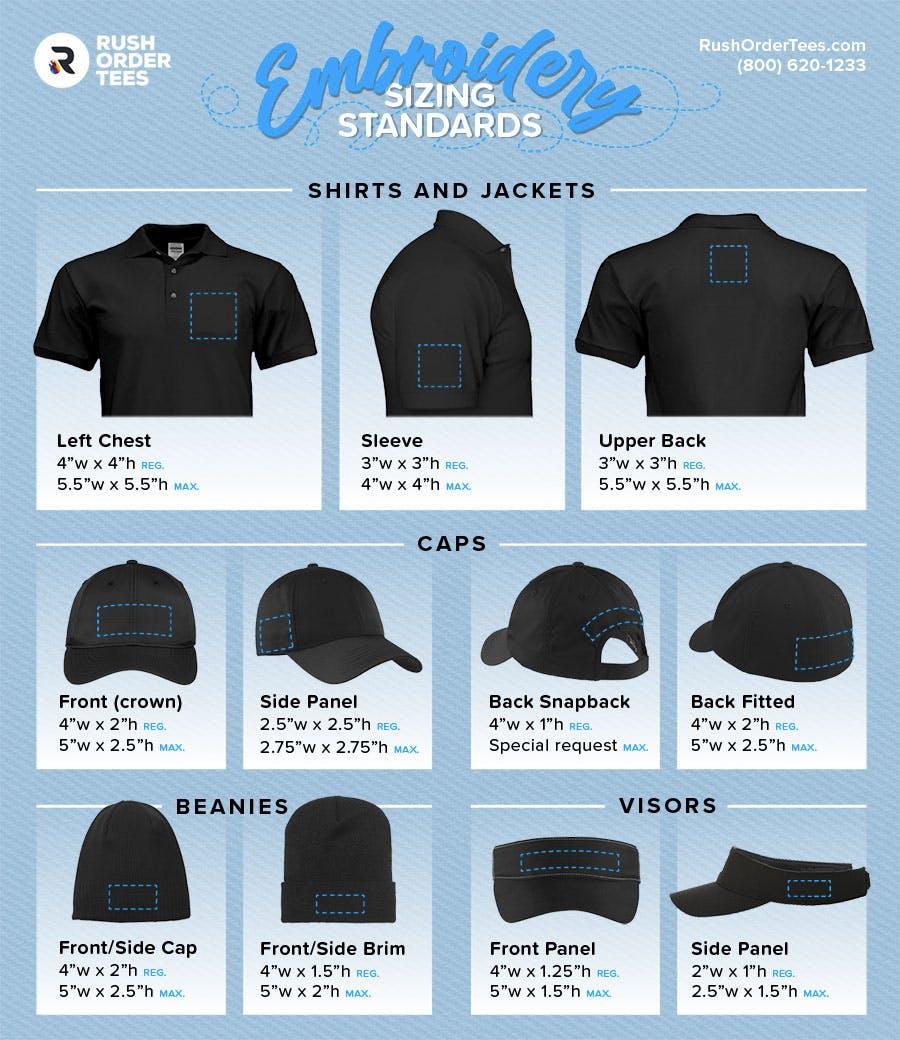
Sizing
Embroidered designs are typically smaller than their printed counterparts. You are much more likely to see embroidered logos on caps and left chest print areas rather than full front or back. Below are some of the most common sizes.
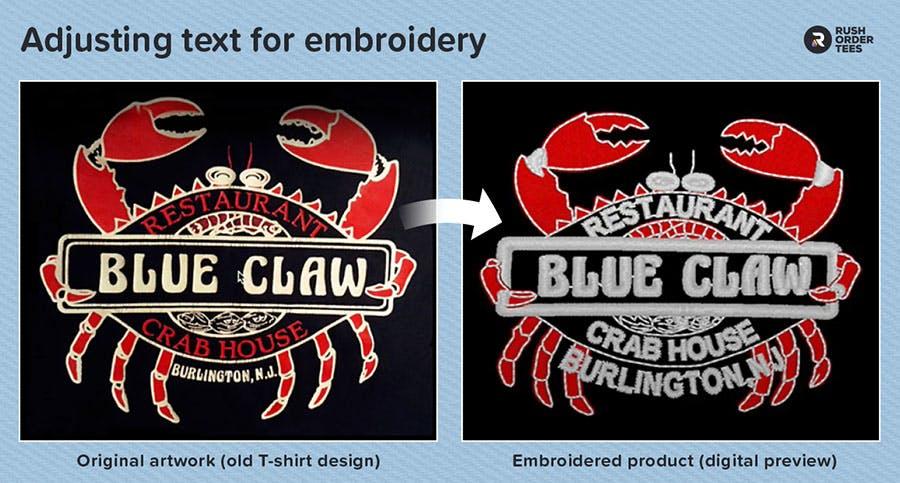
The relatively smaller size of an embroidered logo is an important factor because it limits the amount of achievable detail. Embroidery is where details go to die.
What about a large embroidered design?
It’s not the best idea. While we can embroider up to 11” x 11” (for the back of a jacket, let’s say), keep this in mind: bigger design = bigger thread count = higher price. Also, large embroidered logos can be heavy and weigh down a garment. Not to mention feel uncomfortable.

Level of Detail
The one drawback to embroidering a logo is that the process doesn’t allow for much detail. Of course, that’s made up for by its three-dimensionality, vibrancy, shine, durability, and class, but a lot of designing for embroidery has to do with keeping it simple.

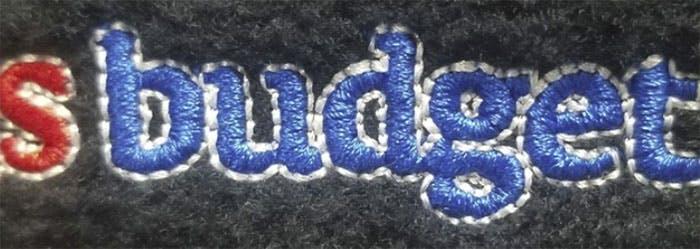
Avoid including small details. Threads make up the entirety of an embroidered logo. Thin lines, subtle patterns, and tiny pieces get lost in the stitching–especially in smaller embroidery designs such as hats, which have a print area of 2” high max (about the length of a thumb).
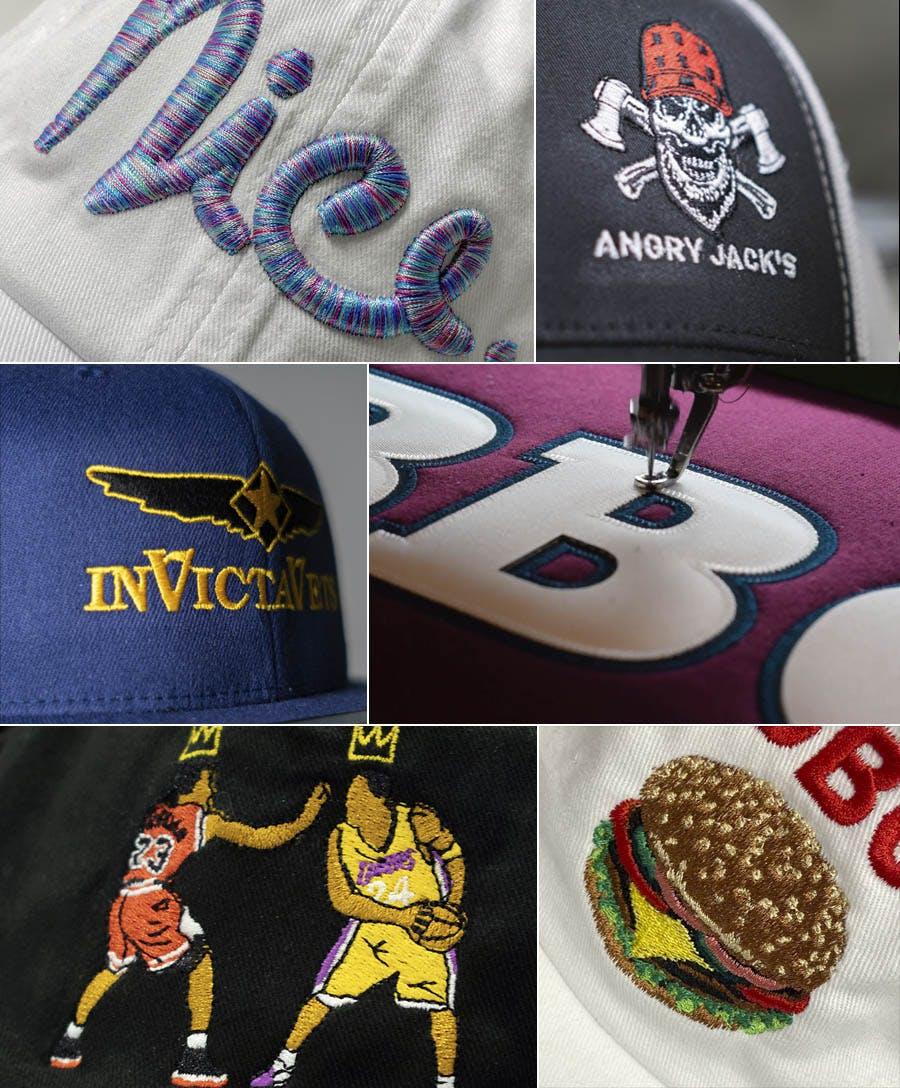
Below is an example of a valiant effort to embroider a detailed design that still doesn’t work out. Although the elements are there, you can’t tell what they are (the hops, the beer mug, the basketball, the sneakers, etc). Avoid this kind of result by simplifying it from the start.
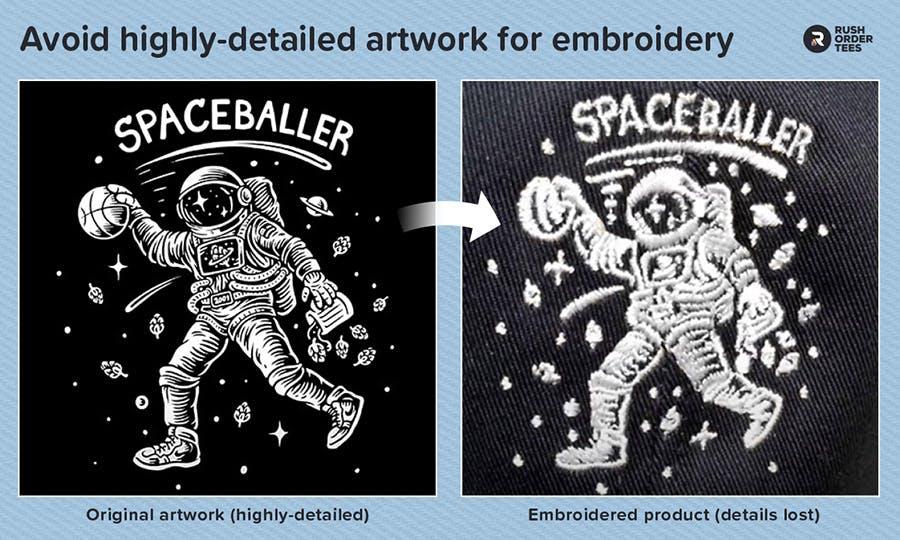
If you can’t increase their individual size, leave them out or consider a different logo layout (more on that coming up). Remember, most people will not see it close up, anyway.
Choosing fonts
Some fonts translate to embroidery much better than others. For the best results, think clean, bold, and simple. Avoid any fonts that are extra thin, distressed, overly complex, or have lots of fancy flourishes.
Most serif fonts and script fonts do not work well at a tiny size. For best legibility, no text should be smaller than 0.25 inches tall. Absolute minimum size for text 0.2 inches tall–but only for simple, bold fonts.
Any small text under 0.5’’ cannot hold a solid stroke. Stay on the safe side: if a stroke is too thin, best to remove it completely. However, strokes can be applied by using a “Running Stich” like the one shown below. We add this type of outline at the time we digitize the logo.
You can request through your sales rep or the “add design notes” section of the Design Studio.
Colors
We limit embroidered logos to 15 colors max, which is plenty for most designs. Choose your primary logo colors, remove the rest, or reduce them to a lower number. This will help keep your design clear and strong and reduce your cost as well.
Think about your garment colors and how to complement them. Remember, the embroidery will be part of the garment. It’s literally sewn in. Look for opportunities to match or complement the colors of your chosen apparel.
Gradients
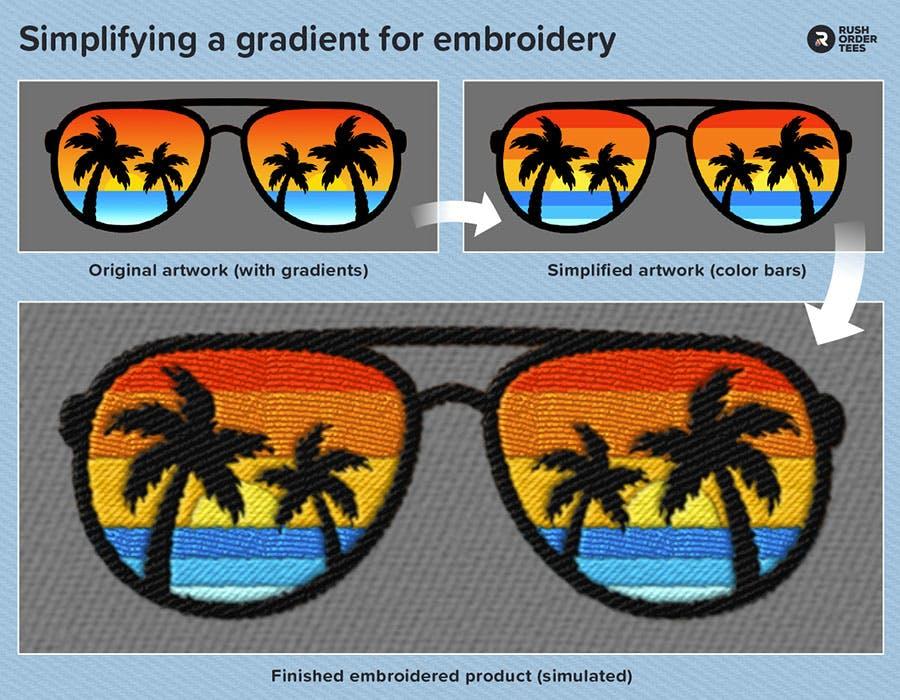
Gradients are difficult to achieve with embroidery. Getting any gradient to look halfway decent is a complex and risky process. We recommend avoiding them entirely. If your logo design relies on a gradient, talk with a sales rep, and we’ll see what we can do for you.
Here is an example of using solid colors to achieve a similar look:
Product and fabric selection
The best places for embroidery are on structured products, such as caps, jackets, aprons, bags, etc. It’s not required, but it’s what works. Unique products and locations (such as pockets on bags) may require different sizing or production considerations, so check with your sales rep.
The optimal fabrics to embroider are thicker and more durable fabrics, such as canvas, denim, cotton fleece, thicker cotton, and cotton/poly blends. Sweatshirts and hoodies are excellent candidates for embroidery. It’s also a good option for stretchy items such as activewear that may be difficult to screen print on.
We do not recommend embroidery for thinner, lighter, delicate fabrics. Sometimes, it can work if the logo is small. Learn how to make custom embroidered patches for an alternative that can work on almost anything.
Types of stitches
Our state-of-the-art embroidery machines can produce a variety of different stitch types and patterns. We list the most common examples below. If you have any special requests for particular types of stitches for your logo, just let us know,. Otherwise, our embroidery experts will set up your order for optimum results.
- Satin stitch – The best-looking stitches for embroidery are denser and more pronounced. Typically used for thick outlines and type.
- Fill stitch – Standard stitch for filling in solid areas. A fill stitch has a neutral pattern and flat appearance. Great for backgrounds.
- Structured fill – Similar to a normal fill stitch, but adds direction and patterns. It can be helpful for visually representing forms and 3-dimensional textures.
- Running stitch – Often a single thread, a running stitch creates outlines around shapes and divisions among colors, along with adding details on top of fills.
4 steps to simplify a logo design for embroidery (example)
Most logos and other designs need some adjustments for custom embroidery, and that typically involves simplifying it. Our Art Dept does for customers every day, but many brands prefer to simplify their artwork before submitting it. The following steps explain how.
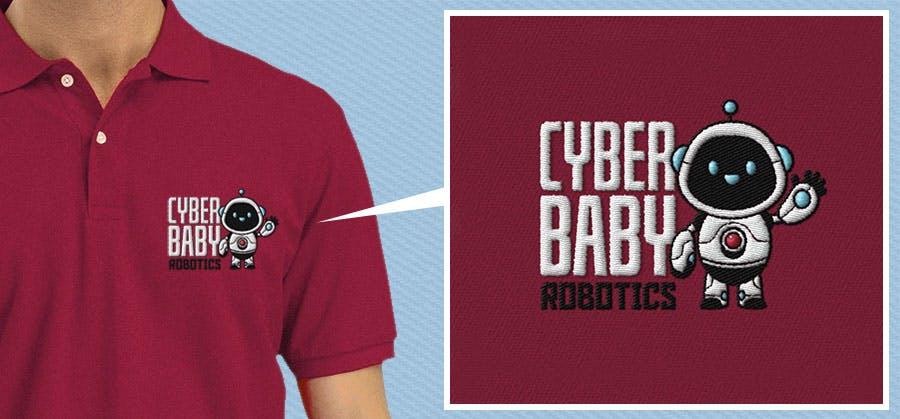
For our example, we’re using this logo for a fictional company called Cyber Baby Robotics.
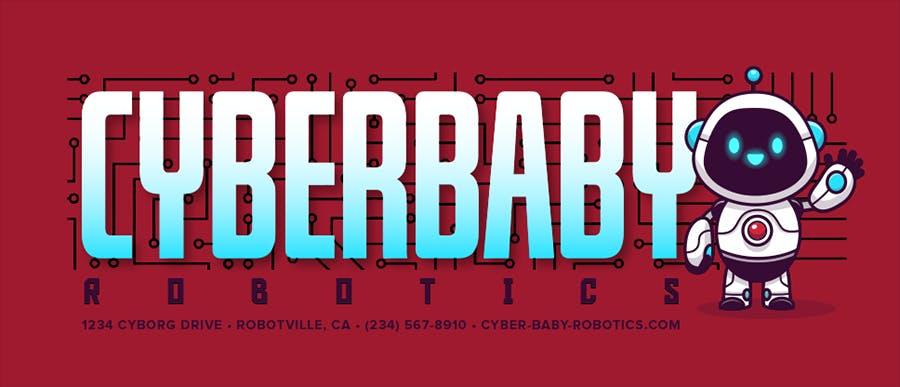
As you can see in the logo, we’re starting out with various sized text, detailed, color shading, gradients, and even glows on that cute little bot. For optimal embroidery embellishment, these things will need to be adjusted.
1. Resize or omit the small type
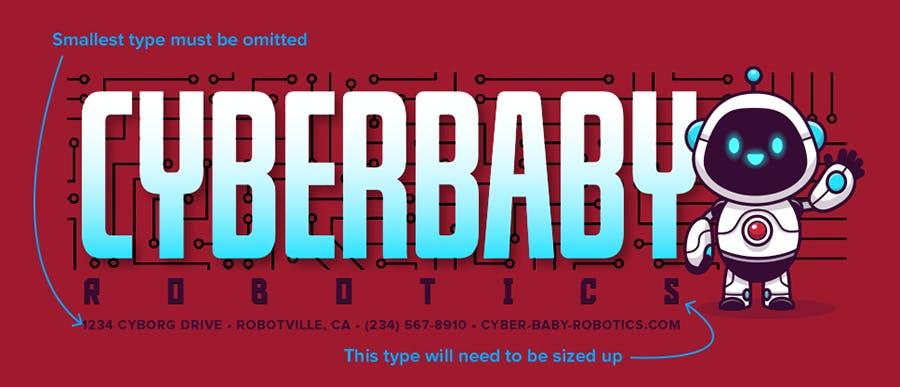
The first of the details that will need to go is any small type. The minimum height for small text is a quarter inch. Fonts that are tall enough but too thin will need to be thickened, sized up, or removed. In our example, the text along the bottom of the logo will need to be omitted. The “Robotics” font is also too small, but it’s part of the name, so we’ll get to that in the last step.
2. Remove any gradients or effects
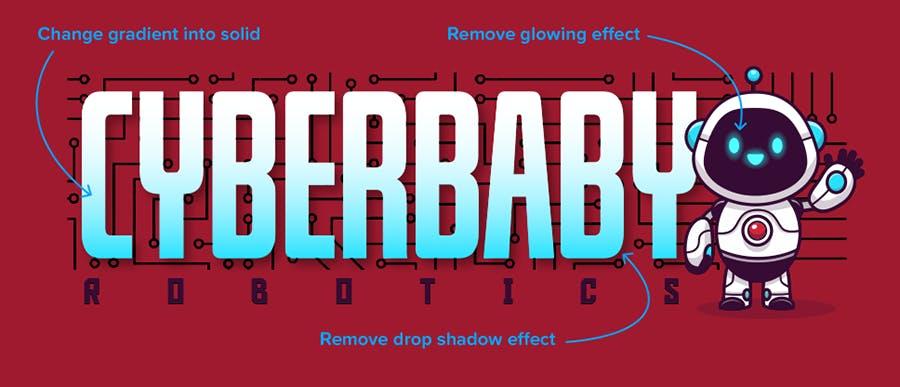
A gradient is any area that fades from one color to another, and they are notoriously hard to achieve with embroidery, so it’s best to avoid them. Especially on the type. We typically change any gradients to solids for embroidered logos. In our example logo, the gradient in the company name needs to be made solid, the drop shadow has to go, and the glowing effect on the robot’s face will need to be omitted.
3. Reduce the number of colors
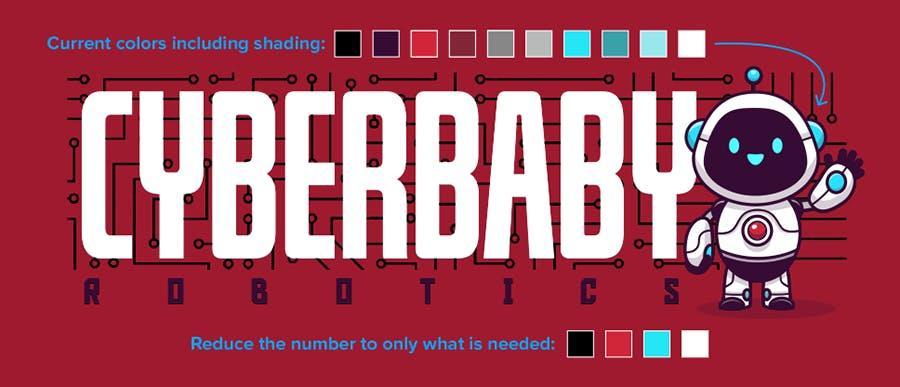
We offer up to 15 thread colors for embroidery, but for most logos, anywhere from three to six colors is plenty. From a design standpoint, too many colors can start looking obnoxious. Thoughtfully reduce the number of colors to a few primary colors for your brand, a few that are needed for the design. Our example order may not appear to have many colors, but the robot’s shading creates a set of secondary colors. So those can go.
4. Remove tiny details, textures, or patterns
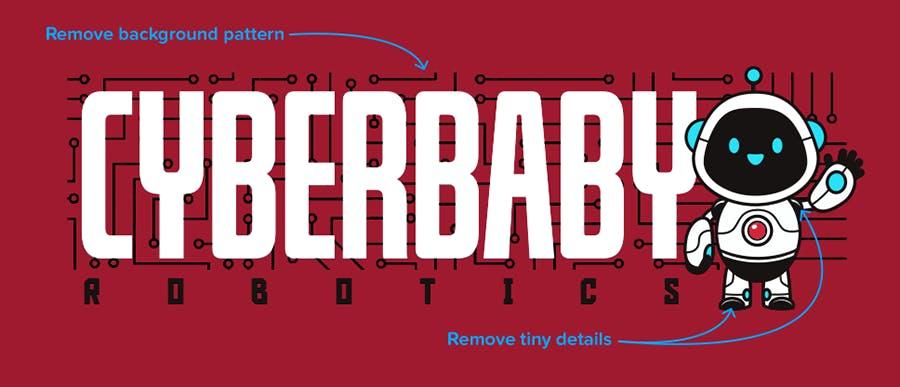
Details can be any minor items or elements that are not essential for the design. They are the one weakness of embroidery, simply because of the nature of the medium, the production process, and that embroidered logos are usually small. Things you can plainly see on a screen or printed do not always translate well to embroidery. In our example, we just need to remove the tiny shine on the shoulders and feet, as removing colors helped simplify it.
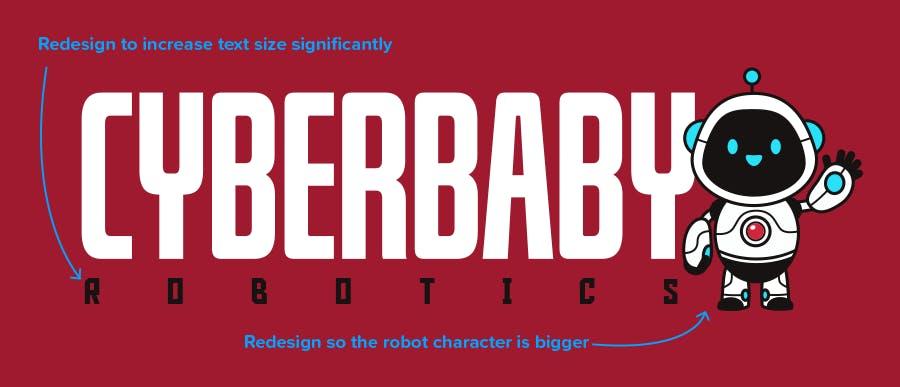
We now have artwork that is optimized for embroidery. But do the dimensions of this logo work? How can we redesign it to be optimal for the print size and location?
Redesigning a logo for embroidery
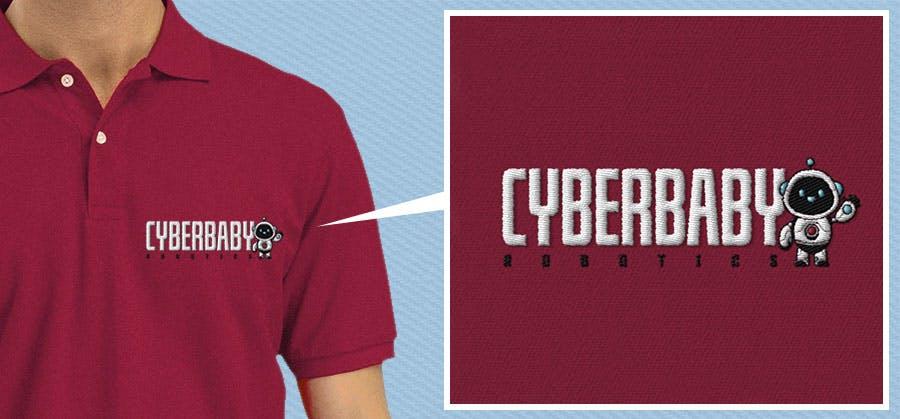
Finally, consider the print size of your embroidered logo and how it will look on the garment or item. You can use our Design Studio to mock it up and see if the dimensions work. Sometimes, it’s better to use a different version of your logo or adjust the elements to make it work.
A digital simulation of our example logo shows that even maxed out 5” wide for a left chest, the robot character loses a lot of detail, and the smaller text is illegible.
By stacking the company name, we increase both the size of the robot character and the text.
There are usually several ways a logo can be redesigned. Experiment with different configurations of your own logo to determine which will work best for embroidery.
Learn more about how to design company shirts for your business.
Summary: The key tips for embroidered logos
- Keep it simple and bold. It should look clear from a distance.
- Make it work with as few colors as possible. 15 is max.
- Avoid tiny details, intricate patterns, and small fonts.
- Omit any gradients, fades, or effects.
- Carefully consider your garment type and print location.
- Reconfigure or redesign your logo as needed.
Logo embroidery FAQs
Can we embroider my logo as-is?
Yes. But be aware that we will need to simplify it for you. Sometimes a design may be simplified in a way that is too distant from your brand or vision, so a different design or print method will need to be considered.
Can we embroider a distressed logo?
Yes. But we cannot embroider small distressed fonts. Replacement or simplification may be required depending on the complexity of the design.
Can we embroider a photograph?
Yes. But there needs to be a significant amount of simplification involved and usually requires customer photo approval.
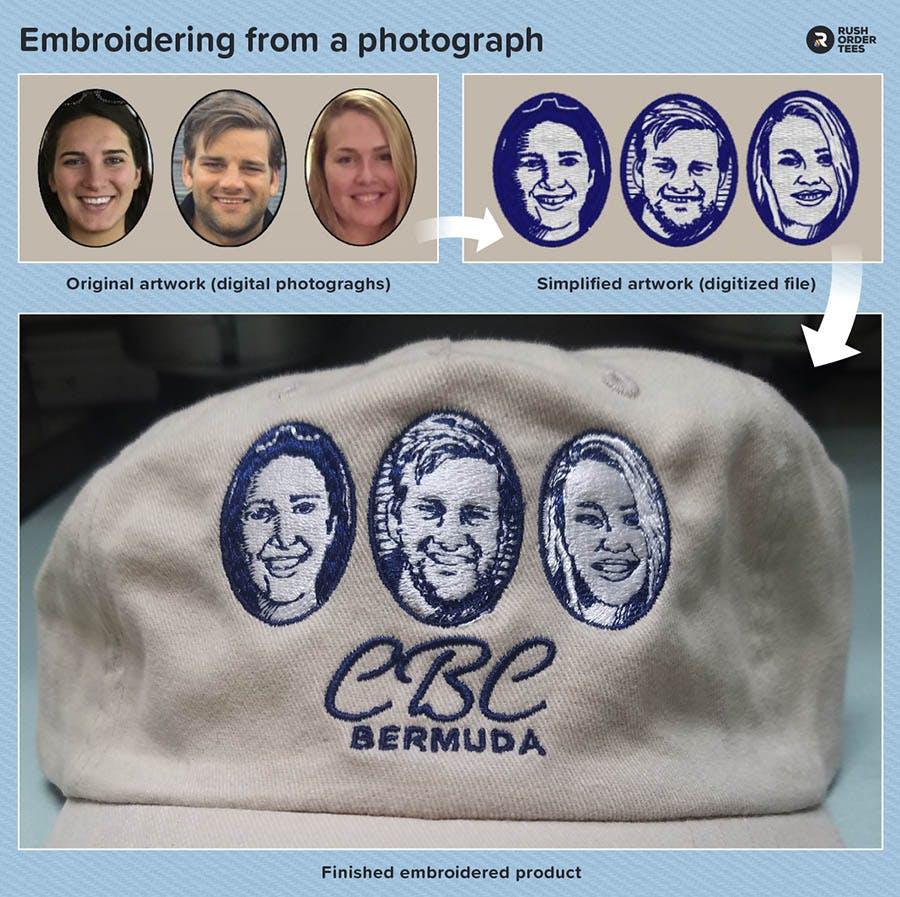
Can we embroider a low-resolution image?
Usually. The quality of the artwork is subjective, but as long as we can make out what’s in the actual picture, we can usually recreate it while digitizing.
Will embroidery threads eventually get loose and come apart?
No. Our embroidery is permanent and high-quality and will last the lifetime of the garment.
When your logo is ready to be embroidered, jump into our Design Studio and get started on your custom order.

About the Author
A graduate of the Multimedia program at the University of the Arts in Philadelphia, Imri Merritt is an industry veteran with over 20 years of graphic design and color separations experience in the screen printing industry.